Jeep Momma is a beginner-friendly Jeep Wrangler resource focused on real-world lessons, trail judgement, and building confidence behind the wheel. I share practical Jeep ownership tips, off-road guidance, and honest insights from learning to wheel as a new Jeep driver.
Over the years many people have had a hard time opening the door to my Jeep. Some just don't know how the handle works while others don't have the strength in their fingers.
It seems it's just not my Jeep. Nebula in the movie Guardians of the Galaxy seemed to have the same issue. See the clip here. She should of been subscribed to my YouTube channel. She would of seen my How To Open Your Jeep Door video.
If you live where snow and ice are part of winter, you've probably seen vehicles with their windshield wipers sticking straight up before a storm. But is lifting your wiper blades actually a good idea?
After years of driving my Jeep through harsh Minnesota winters, I've learned there are times when lifting your windshield wipers helps and times when it can actually cause problems.
Here's what every Jeep owner (and any driver in a snowy climate) should know.
Quick Answer
Should you lift your windshield wipers before snow or ice?
Sometimes.
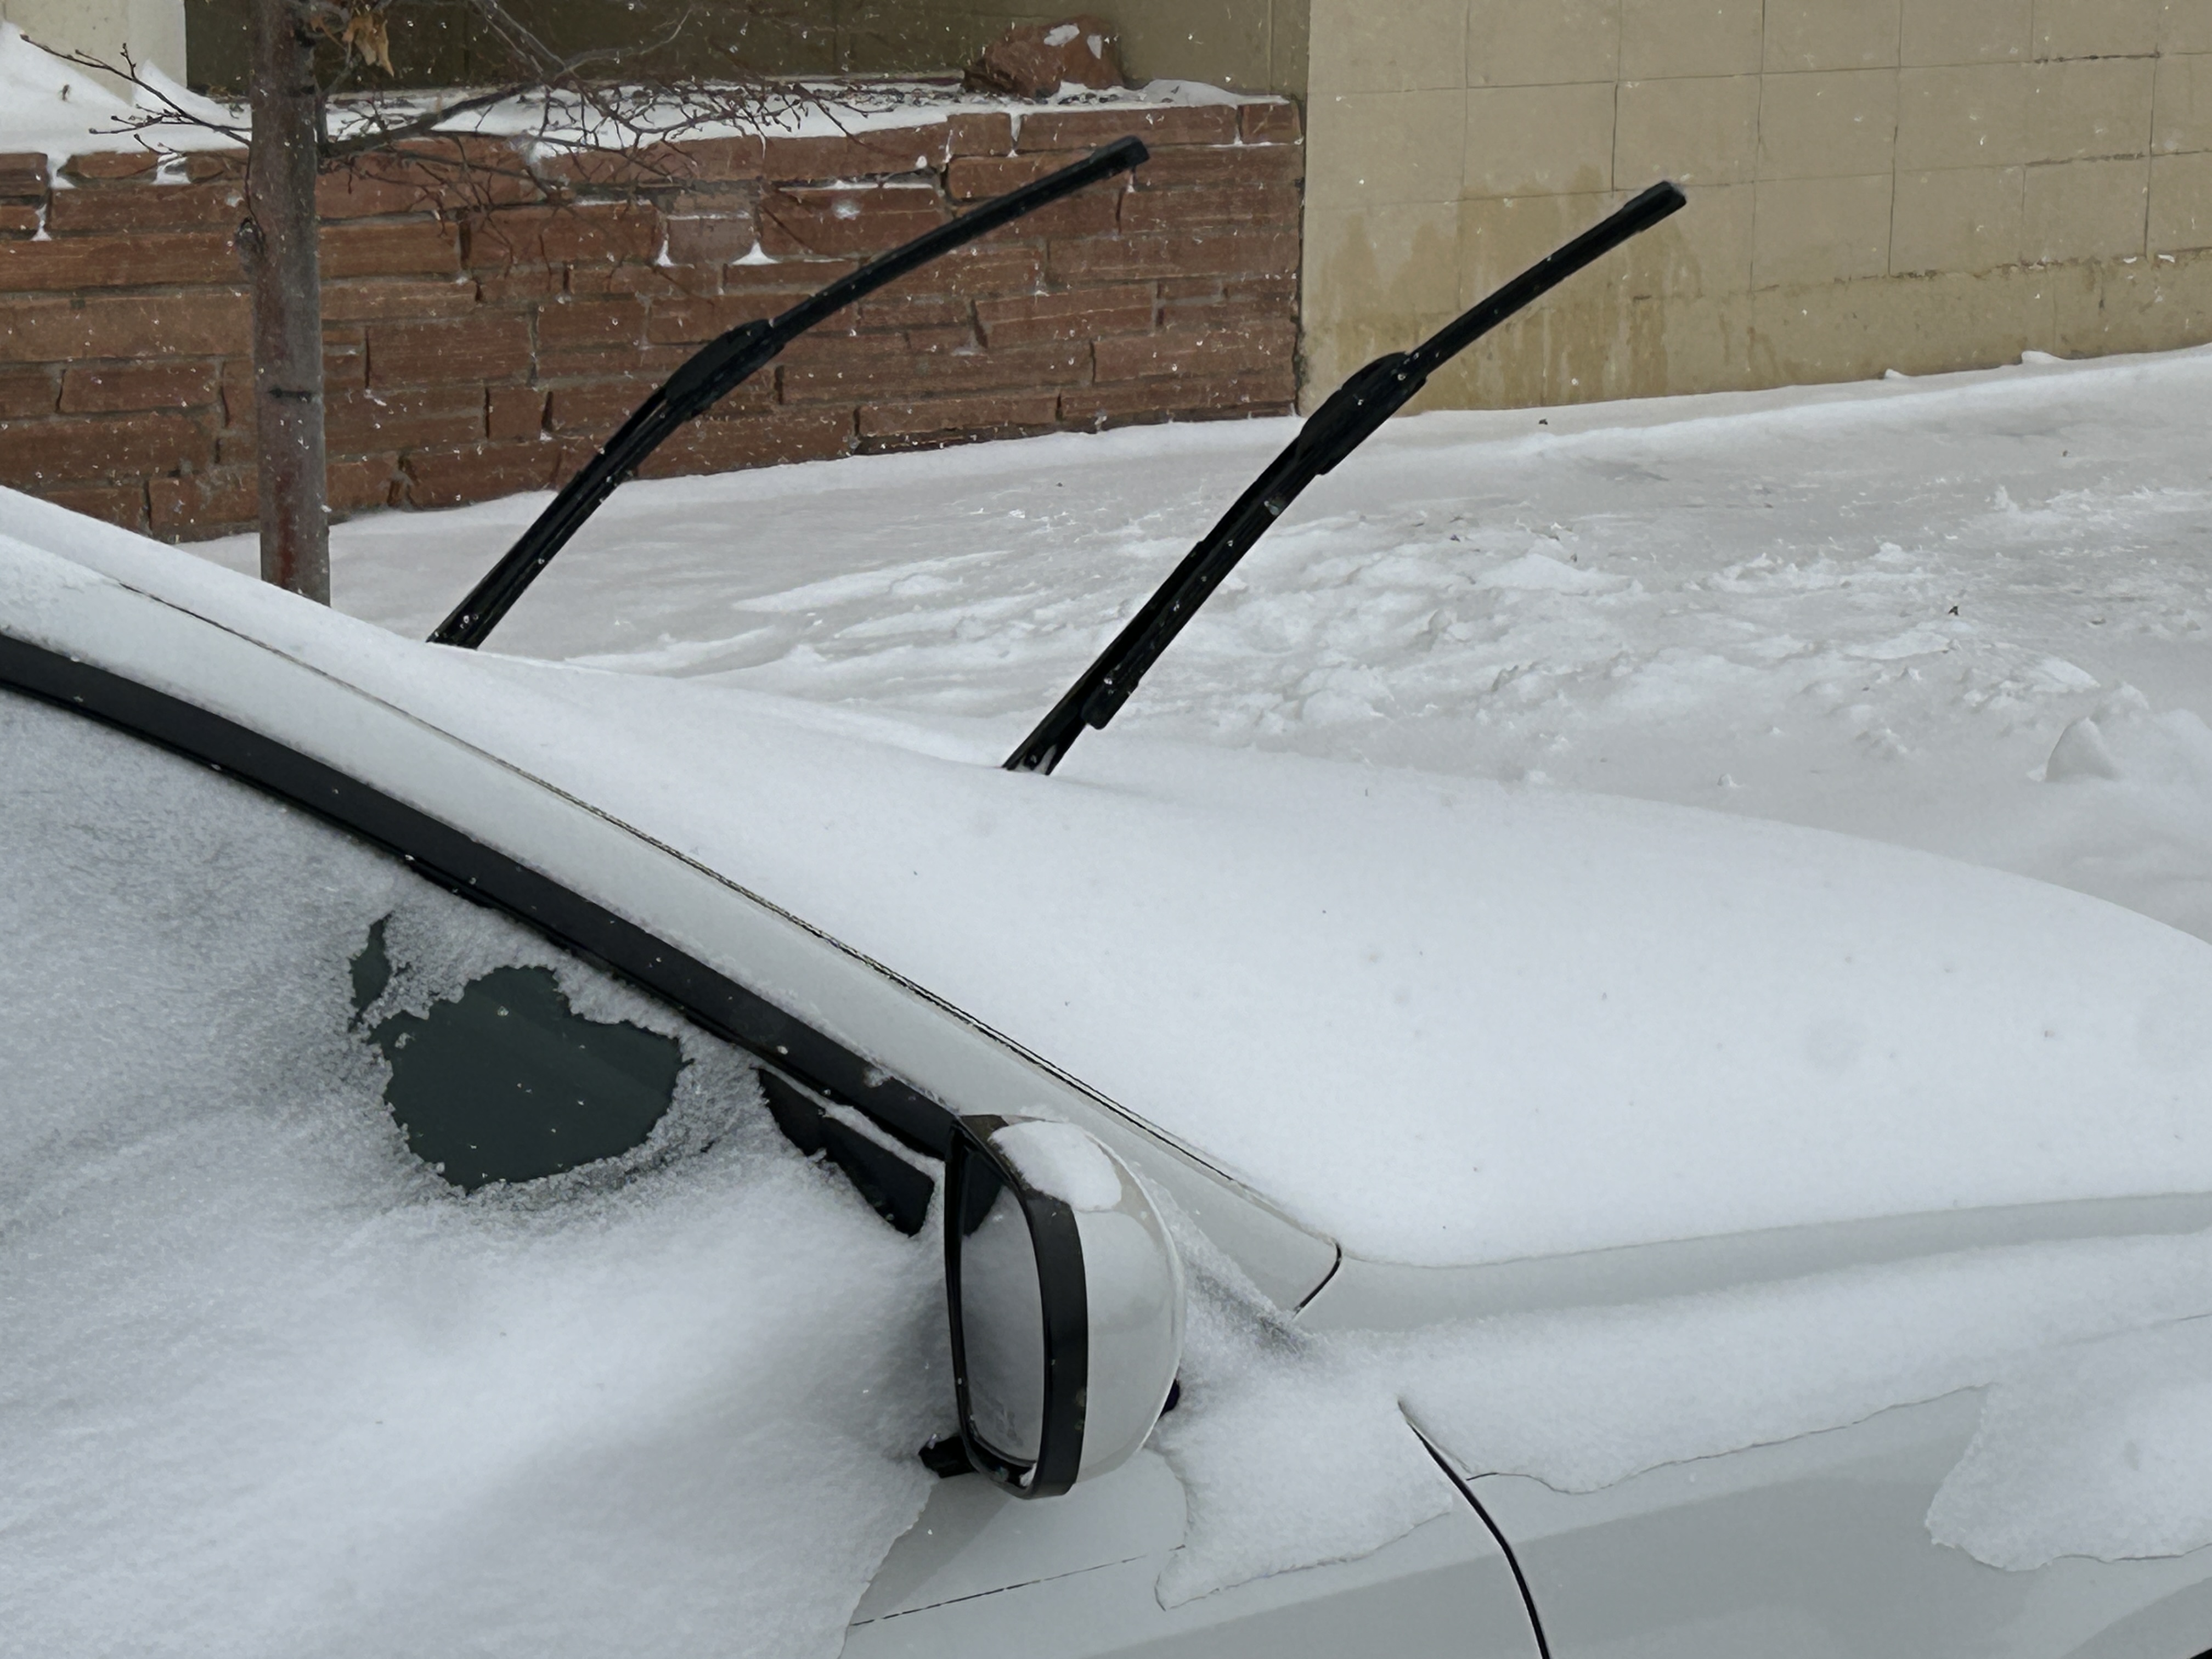
If freezing rain or heavy snow is expected, lifting your wiper blades can help prevent the rubber from freezing to the windshield, making morning cleanup easier. However, in high winds or severe ice storms, leaving them down may actually reduce the chance of damaging the wiper arms.
The best solution is combining good winter preparation with quality winter wiper blades and proper windshield care.
Lifted wiper blades in the snow
Why People Lift Their Windshield Wipers
The idea is simple.
If the rubber blade isn't touching the windshield, it can't freeze to the glass.
That means:
✔ Easier snow removal
✔ Faster ice scraping
✔ Less chance of tearing the rubber blade
✔ Less time spent fighting frozen wipers before work
I've done this many times before overnight snowstorms, especially when my Jeep is parked outside.
The Benefits of Lifting Your Wipers
Prevents Frozen Wiper Blades
One of the biggest frustrations during winter is discovering your wipers frozen solid against the windshield.
Trying to force them loose can tear the rubber or strain the wiper motor.
Lifting them beforehand often prevents this problem.
Makes Ice Removal Easier
Without the wipers in the way, it's much easier to:
scrape ice
brush snow
spray de-icer
clear the entire windshield
That can save several minutes on cold mornings.
Helps Extend Blade Life
Frozen blades can crack, split, or wear prematurely.
Keeping them off the glass during storms may help your blades last longer.
The Downsides of Lifting Your Wipers
While many drivers swear by this trick, there are a few drawbacks.
Wind Can Slam Them Down
Strong winter winds can catch the raised wiper arm.
If it snaps back onto the windshield, it can:
crack the windshield
damage the wiper arm
bend the spring mechanism
Ice Can Freeze the Arms Upright
Freezing rain can lock the arms in the raised position.
Lowering them afterward may require careful thawing.
What I Personally Do
Living in Minnesota means I see plenty of snow, ice, and freezing temperatures.
Here's my routine:
If heavy snow is expected overnight, I'll often lift the wipers.
If freezing rain or strong winds are in the forecast, I usually leave them down and focus on thoroughly clearing the windshield before driving.
No matter what, I never force frozen blades across the glass.
5 Tips to Make Your Wiper Blades Last Longer
1. Defrost Before Using the Wipers
Never use frozen wipers to clear ice.
Allow your defroster to loosen the ice first.
2. Replace Blades Every 6–12 Months
Rubber naturally wears out from:
sunlight
heat
cold
road salt
If your blades streak or chatter, it's time for new ones.
3. Keep Your Windshield Clean
Road grime acts like sandpaper.
Cleaning your windshield regularly helps your blades last longer.
4. Never Run Dry Wipers
Always use windshield washer fluid.
Running dry blades across dusty glass causes unnecessary wear.
5. Inspect Them Regularly
I check mine:
during oil changes
before long road trips
after winter storms
at the start of every winter
It only takes a minute.
Jeep Momma's Winter Driving Tip
Don't forget about your windshield washer fluid.
Summer washer fluid can freeze in extremely cold temperatures. Switch to a winter-rated washer fluid before temperatures drop below freezing.
It's a simple maintenance step that makes a huge difference during snowstorms.
Winter Products I Recommend
These are products I personally keep on hand during winter.
Yes, lifting them can help prevent the rubber blades from freezing to the windshield and make snow removal easier.
Can lifting windshield wipers damage them?
It can. Strong winds may slam the wiper arms into the windshield, and repeated lifting over time may weaken the spring tension.
How often should windshield wiper blades be replaced?
Most experts recommend replacing them every 6 to 12 months, depending on climate and use.
Is it bad to use wipers on a dry windshield?
Yes. Running dry blades can wear the rubber prematurely and may scratch dirty glass. Always use washer fluid first.
What's the best way to keep windshield wipers from freezing?
Park in a garage when possible, use winter washer fluid, clear ice before driving, and consider lifting the blades when heavy snow not freezing rain is expected.
Final Thoughts
Windshield wipers are one of the most overlooked safety features on your Jeep.
Whether you choose to lift them before a winter storm depends on the weather conditions, but keeping your blades clean, replacing them regularly, and using the right winter products will do far more to improve visibility than any single trick.
A few minutes of maintenance can make winter driving safer and help your wiper blades last longer.
Written by Tammy "Jeep Momma" Forsyth - a Jeep Wrangler owner, off-road enthusiast, and content creator who has explored trails across Colorado, Wyoming, Arizona, Utah, and beyond. Through Jeep Momma, she shares firsthand Wrangler ownership experiences, trail guides, DIY modifications, camping setups, and Jeep community stories to help new and experienced Jeep owners get more from their adventures.
Jeep Momma contains Amazon affiliate links. I receive commissions for purchases made through those links, at no cost to you. I recommend products and services because I think they are helpful and useful, not because of the small commissions I make if you decide to buy something.
Willys is pronounced “WILL-iss” (rhymes with illis), not “will-ees.”
The name comes from John North Willys, who pronounced his last name “WILL-iss.” However, “will-ees” has been commonly used for decades and is widely accepted in casual conversation.
Why “Willys” Is Pronounced “WILL-iss”
John North Willys pronounced his last name “WILL-iss,” which makes this the historically correct pronunciation. Willys-Overland Motors followed the same pronunciation.
That said, “will-ees” has been used so widely for decades even by respected Jeep historians that both pronunciations are commonly heard today.
Willys MB: First Jeep
The
iconic Jeep® Brand is recognized all over the world. Every Jeep Brand vehicle
has a unique story to tell, with a rich heritage that links back to the
original Willys MB. The first Jeep to hit the
production line.
This "Go
Anywhere, Do Anything" Jeep 4x4 vehicle became the hero for thousands
of Allied soldiers around the world in the 1940's. Later becoming the civilian
hero for many decades to come.
Military Jeep
Why the Military Needed the Jeep
During
the war the US infantry
needed a low-profile, powerful vehicle with four-wheel drive. Three commercial
companies put in their bids, American Bantam, Willys Overland Motors, and
Ford Motor Company. This is the Birth of Jeep an American Icon.
Willys Overland factory
Willys-Overland and the Birth of Jeep
Each
company was tasked to build a vehicle for testing. In July of 1941 the
contract was awarded to Willys Overland motors using combined parts of all three
prototypes. The Willys MB was born.
John North Willys was an American automotivepioneer
and diplomat. His company, Willys-Overland Motors, became the second largest carmaker in the United States
after Henry Ford.
TIME OUT --John Willys is spelled Willys. Willys
Overland Motors is spelled Willys. Its pronounced WIL-IS. That is how the owner
pronounced his last name. So WIL-IS must be the proper pronunciation
A quick look at the top of either Wikipedia page will show that
the proper pronunciation is wil-is. That said,
the incorrect pronunciation of Willys, (willies) has been used for many
decades by people of all walks of life, up to and including many of the world's
most esteemed Jeep historians, that it's become acceptable to hear and use
either pronunciation.
The Three Original Jeep Prototypes
Willys Quad
Designed by Willys Overland Motors in Toledo,
Ohio. This little beast of a machine was powered by it's "Go Devil"
engine that produced 61 mph, along with 105 foot pounds of torque.
Willys Quad
Blitz Buggy
Designed by American Bantam out of
Butler, Pennsylvania. Working with Spicer, one of Bantam's focuses was
axles and transfer case.
Blitz Buggy
Pigmy
Designed by Ford Motor Company. The two
Ford pilot vehicles are now sitting in museums. It is said neither the original
Bantam Pilot nor the Willys Quad survived.
Pigmy
FAQs: Pronouncing Willys
How do Jeep historians pronounce Willys?
Most historians acknowledge “WILL-iss” as correct, though “will-ees” is commonly used.
Is it wrong to say “will-ees”?
Not really. While “WILL-iss” is historically accurate, both pronunciations are widely accepted today.
Why does pronunciation matter in Jeep culture?
Because Jeep history is deeply tied to Willys-Overland and its founder, John North Willys.
Quick Answer: How Do You Replace a Jeep Cabin Air Filter?
To replace a Jeep Wrangler cabin air filter, open the glove box, remove the filter access cover behind it, slide out the old filter, and install the new filter with the airflow arrow pointing in the correct direction. Most Jeep owners can complete this easy DIY maintenance task in under 10 minutes
Where Is the Jeep Wrangler Cabin Air Filter Located?
The cabin air filter is located behind the glove box in most Jeep Wrangler models. Lower the glove box to access the filter housing, then remove the cover and slide the filters out.
If the air coming from your Jeep's vents smells musty, the airflow seems weaker than it used to, or dust keeps blowing into the cabin, it may be time to replace your cabin air filter.
This is one of the easiest Jeep maintenance projects you can do yourself, and most owners can finish it in less than 10 minutes.
My Jeep is a 2015 Jeep Wrangler Unlimited Rubicon, and for years I drove without a cabin filter installed. Earlier this year, I finally added one and honestly, I noticed a difference right away with cleaner airflow inside the Jeep.
This simple Jeep maintenance project is beginner-friendly and requires no special tools. The exact access steps may vary slightly by Wrangler generation, but the cabin air filter is generally accessed behind the glove box. This guide demonstrates the process on a 2015 Jeep Wrangler JK.
The cabin air filter helps clean the air flowing through your Jeep’s:
Heating system
Air conditioning
Ventilation system
A clean filter helps reduce:
Dust
Pollen
Allergens
Trail debris
Musty odors
If you spend time off-road like I do, your filter can clog faster from dusty trails and dirt roads.
Where Is the Cabin Air Filter Located on a Jeep Wrangler?
On most Jeep Wranglers, the cabin filter is located behind the glove box inside the fresh air inlet housing.
Some Jeep Wranglers leave the factory without a filter installed, but the housing is still there and ready for one.
If your Jeep has a recirculation knob, you may need to adjust it to gain access to the filter compartment.
Jeep Glovebox
Cabin Filter Removal and Replacement
How To Replace Your Jeep Cabin Air Filter
Step 1: Open the Glove Box
Open your Jeep glove box and carefully remove it to access the cabin filter housing behind it.
Step 2: Locate the Cabin Filter Access Doors
Behind the glove box, locate the two retaining tabs securing the HVAC filter access doors.
Press the tabs to open the access doors.
Step 3: Remove the Old Cabin Filters
Pull the old filters straight out one at a time.
If your Jeep never had a cabin filter installed from the factory, you can skip this step and move directly to installation.
Step 4: Install the New Cabin Filter
Insert the new cabin filter in the correct airflow direction.
Most filters have an airflow arrow printed on the side showing proper installation direction.
Jeep Momma Tip
Before installing the new filter, use a vacuum or clean rag to remove any leaves, dirt, or debris inside the filter housing. It only takes a minute and helps keep the new filter cleaner longer.
Step 5: Reassemble Everything
Close the filter access doors and secure the retaining tabs.
Reinstall the glove box and make sure everything snaps back into place properly.
That’s it your Jeep’s HVAC system is ready for cleaner airflow.
Be Careful
Pay attention to the airflow arrow printed on the side of the filter. Installing it backward can reduce airflow and make your HVAC system less efficient.
How Often Should You Replace a Jeep Cabin Air Filter?
Jeep recommends replacing the cabin air filter every 20,000 miles under normal driving conditions.
However, if you:
Drive dusty trails
Go off-road frequently
Travel gravel roads
Wheel in desert environments
You may want to replace it every 10,000–12,000 miles instead.
I replace mine more often because dusty trails can clog a filter much faster than everyday highway driving.
Signs Your Jeep Cabin Filter Needs Replacing
Here are common symptoms of a dirty cabin air filter:
Weak airflow from vents
Dust buildup inside the Jeep
Musty or unpleasant smells
Reduced A/C performance
Foggy windows that clear slowly
Replacing the filter can improve both airflow and HVAC efficiency.
For more Jeep Momma How to's from How to Use Your Axle locks to How to swap diff covers check out my How To page.
Frequently Asked Questions about Jeep's Cabin Filter
How often should I replace my Jeep's cabin air filter?
You should replace your Jeep’s cabin air filter every 12,000 to 15,000 miles or at least once a year. If you drive off-road often, replace it more frequently.
What happens if you don’t replace your cabin air filter?
A dirty cabin filter reduces airflow, causes bad odors, and makes your A/C work harder, leading to potential HVAC damage.
Can I clean and reuse my Jeep’s cabin air filter?
Most standard filters cannot be reused, but some aftermarket brands like K&N offer washable and reusable filters.
What are the signs of a clogged cabin air filter?
If you notice weak airflow, strange smells, or excessive dust inside your Jeep, it’s time to replace the filter.
Is replacing the cabin air filter difficult?
No. It's one of the easiest DIY maintenance jobs on a Jeep Wrangler and usually takes less than 10 minutes.
Does replacing the cabin air filter improve air conditioning?
Yes! A clean filter improves airflow and A/C efficiency, helping keep your Jeep cooler in the summer and warmer in the winter.
Does every Jeep Wrangler have a cabin air filter?
Not always. Some Wrangler models came from the factory without a cabin air filter installed, even though the housing is already designed to accept one.
Which way does the airflow arrow point?
Always install the filter following the airflow arrow printed on the side of the filter. If you're unsure, consult your owner's manual or the instructions included with the replacement filter.
Where is the cabin air filter in a 2015 Jeep Wrangler?
On a 2015 Jeep Wrangler JK, the cabin air filter is located behind the glove box. Lower the glove box to access the filter housing, remove the cover, and slide out the old cabin air filters. The replacement takes less than 10 minutes with basic hand tools.
Does a 2016 Jeep Wrangler have a cabin air filter?
Yes. The 2016 Jeep Wrangler JK has a cabin air filter located behind the glove box. Replacing it is a simple maintenance task that helps keep dust, pollen, and debris out of your Jeep's cabin while improving airflow through the heating and air conditioning system.
Where is the cabin air filter in a 2017 Jeep Wrangler?
On a 2017 Jeep Wrangler JK, the cabin air filter is also located behind the glove box. Access the filter housing by lowering the glove box, then remove the cover to replace the filters. The process is quick and beginner-friendly.
More Jeep Momma How-To Guides
Continue Learning
If you're tackling Jeep maintenance yourself, these guides are a great next step:
Written by Tammy "Jeep Momma" Forsyth - a Jeep Wrangler owner, off-road enthusiast, and content creator who has explored trails across Colorado, Wyoming, Arizona, Utah, and beyond. Through Jeep Momma, she shares firsthand Wrangler ownership experiences, trail guides, DIY modifications, camping setups, and Jeep community stories to help new and experienced Jeep owners get more from their adventures.
After a year-long hiatus from off-roading, I couldn't wait to get back behind the wheel of my Jeep and tackle the rugged terrain of the Rocky Mountains.
Selfie on the trails in my Jeep
Trail Characteristics
Moody Hill is an 18.6-mile out-and-back trail located near Bellvue, Colorado, in the Arapaho & Roosevelt National Forest. This intermediate trail offers a perfect blend of challenge and scenic beauty, making it an ideal choice for off-road enthusiasts looking to explore the Front Range.
Rocky terrain: It features a steep and rocky climb at the beginning, making it one of the more difficult trails in the area.
Scenic views: The trail provides breathtaking views of the Rocky Mountains and surrounding landscape.
Varied difficulty: While mostly intermediate, it includes sections suitable for more advanced off-roaders, such as a quarry area for rock crawling.
Selfie on top of Moody Hill Colorado
As I approached the trailhead, I could feel my excitement building. The trail begins with a rocky climb that immediately tests your vehicle's capabilities and your driving skills. This initial ascent sets the tone for the rest of the journey, which is filled with diverse terrain and stunning vistas.
One of the highlights of Moody Hill is the quarry area, which is reserved for more experienced off-roaders with rock buggy-style vehicles. I didn't venture into this section.
Breathtaking Scenery
Throughout the trail, I was constantly in awe of the surrounding landscape. The Front Range, part of the Rocky Mountains, stretches an impressive 180 miles from Wyoming to Colorado. The sheer scale of these mountains is humbling, and the views from various points along the trail are nothing short of spectacular.
However, I never take the Rockies for granted because even though these mountains are amazing they can quickly turn on you. You need to be prepared in several areas.
Know Your Limits: Moody Hill is rated as moderate, but some sections can be challenging. Don't push beyond your skill level or your vehicle's capabilities.
Stay Informed: Check trail conditions and closures before your trip. Moody Hill is typically open from June 15 to November 30.
Respect the Environment: Practice Leave No Trace principles to preserve these beautiful trails for future generations.
Retrospective
As I drove back along the scenic byway after conquering Moody Hill, I felt a deep sense of gratitude. The Rocky Mountains have a way of putting life into perspective, reminding us of nature's grandeur and our place within it.
As an avid Jeep enthusiast and outdoor adventurer living in Wyoming’s chilly climate, staying warm is essential. When Sabot Heat offered me their battery-heated gloves to test, I eagerly accepted. These gloves quickly became indispensable, even transforming my daily commute during frigid winter mornings.
Exceptional Warmth in Extreme Cold
During the 2023 winter, temperatures regularly dipped below 30°F, putting these gloves to the test. Whether driving to work, running errands, or spending extended periods outside, my hands stayed incredibly warm and comfortable. The consistent warmth significantly improved my overall winter experience.
Jeep Momma bundled up wearing the Sabot Heated gloves.
High-Tech Features and Functional Design
Responsive Touchscreen Compatibility
One impressive feature is the gloves’ touchscreen capability. The fingertips allowed seamless smartphone usage without removing the gloves, ideal for daily tasks in cold conditions.
Lightweight and Flexible
Despite their sophisticated heating elements, the Sabot Heat gloves remain lightweight and surprisingly flexible. The embedded batteries are barely noticeable, ensuring comfortable wear throughout the day.
Advanced Heating Technology
Sabot Heat incorporates patented carbon nanotube heating technology into their gloves. This advanced feature provides rapid, even heat distribution across the back of the hands and fingertips, enhancing overall warmth. Four adjustable temperature settings allow personalized comfort for any weather condition.
Jeep Momma wearing the heated gloves.
Versatile Usage for Winter Activities
These gloves excel in a wide range of winter activities:
Skiing and snowboarding
Winter hiking and cycling
Daily commuting and errands
Additionally, they're excellent for individuals dealing with arthritis or joint pain, delivering soothing heat to ease discomfort.
Frequently Asked Questions (FAQs)
Q: How long does the battery last on Sabot Heat gloves? A: Battery life typically ranges from 3 to 8 hours, depending on your selected heat level.
Q: Are the Sabot Heat gloves waterproof? A: Yes, they're designed to be water-resistant, offering protection in snowy and wet conditions.
Q: Can I use my smartphone while wearing these gloves? A: Absolutely! The touchscreen-friendly fingertips allow easy smartphone usage.
Q: Are heated gloves safe to wear for extended periods? A: Yes, Sabot Heat gloves have built-in safety features that prevent overheating and are safe for prolonged use.
Expert Recommendation
Having thoroughly tested these gloves during Wyoming's tough winter, I highly recommend Sabot Heat’s battery-heated gloves. Their excellent warmth, touchscreen capability, and comfort make them an ideal winter accessory for anyone who spends significant time outdoors.
Investing in quality heated gloves can dramatically enhance your winter comfort. Sabot Heat gloves offer reliable warmth, convenience, and versatile usage, making them perfect for daily activities and outdoor adventures alike.
Jeep Momma is a participant in the Amazon Services LLC Associates Program, an affiliate advertising program designed to provide a means for us to earn commissions by linking to Amazon.com and affiliated sites. When you click on and/or make a purchase through a link to an Amazon Affiliate link placed on this website, we may receive a small commission at no additional cost to you.
I recently embarked on an unforgettable journey with 4Xploring along the Northern Rim of the Grand Canyon. This five-day, four-night adventure through the Grand Canyon Parashant National Monument was a true test of overlanding skills and a feast for the senses.
Find out all about What is 4Xploring in my Jeep Life with Jeep Momma YouTube video.
Camping on the Northern Rim of the Grand Canyon
The Journey Begins: From Cheyenne to Mesquite
Our expedition kicked off at TNT Customs in Cheyenne, Wyoming. We embarked on a two-day trek to Mesquite, Nevada, our official starting point. We headed South to Colorado through the Rocky Mountains. It felt good to see those majestic mountain ranges again. It only confirmed I made the right choice to leave the Midwest and get back out to the Wild Wild West. There is so much adventure in those Rockies and still so much left for me to explore.
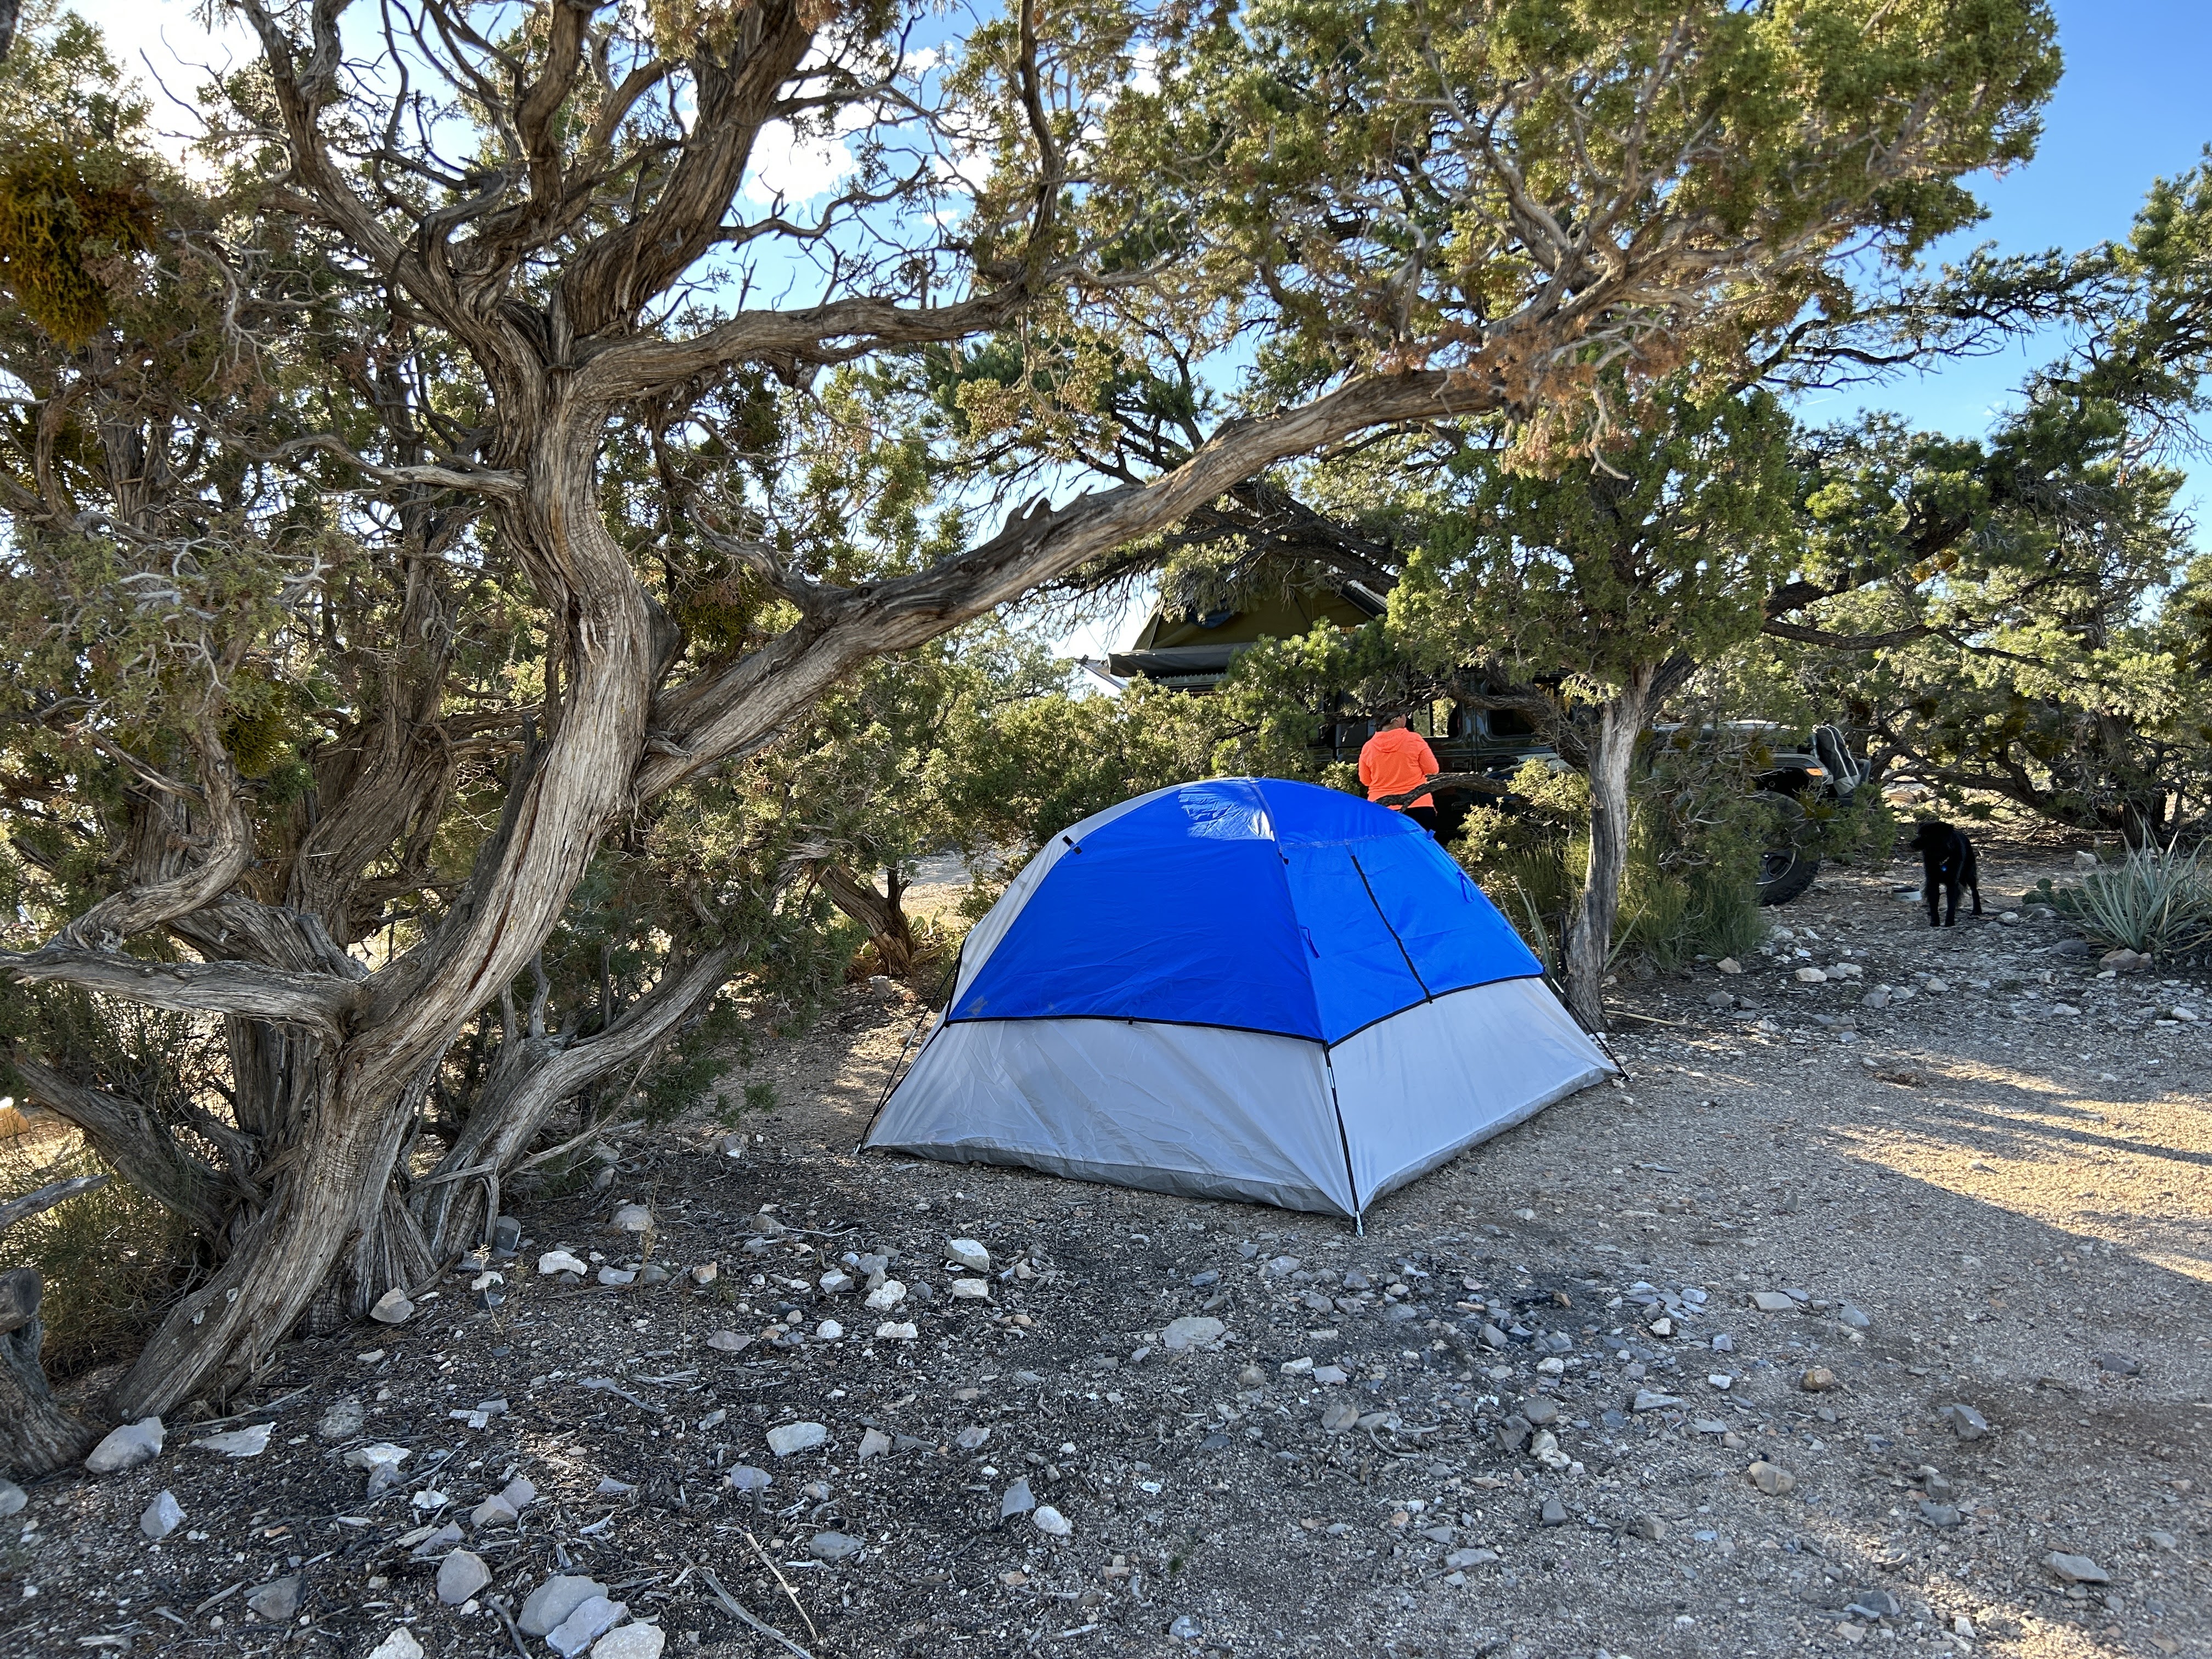
As daylight faded, we sought a campsite in Cathedral Valley, Utah. Cathedral Valley, a remote location at the northern end of Capitol Reef National Park, is a hidden gem characterized by towering sandstone monoliths and vast desert landscapes. By the time we arrived, the sun had set, leaving only the stars to guide us. I quickly set up my ground tent in the dark, a familiar task for me. Afterward, I took a moment to marvel at the stunning night sky, filled with stars and the Milky Way.
Tent at night in Cathedral Valley
The next morning, I managed to pack my tent back into its original bag—an impressive feat! However, this was the only time I succeeded during the trip, though I came close a few times. After packing up, we headed to Mesquite, Nevada, racing against the clock to check into our hotel by 3 PM. This stop was our last chance for amenities before embarking on a five-day overlanding adventure.
Selfie in Cathedral Valley
Packing up my tent in the original bag
Along the way we cut through Zion National Park. One of the five mighty National Parks in Utah. Zion is spectacular with breathtaking views. We took the scenic by-way through Zion. Utah has 28 scenic by-ways around the state. This by-way showcases stunning views of out-of-this-world rock formations, mounds, towers, and hilltops. Colorful layered strata of rusty red, orange, creams, yellow, and brown fill the views.
Zion National Park
Rock Formations in Zion National Park
Day 1: Venturing into the Arizona Strip
Leaving Mesquite with full gas tanks and extra fuel, our convoy of 11 vehicles tackled the Virgin Mountains over Lime Kiln Pass. This rugged desert path is highlighted by rocky twisting canyons and vast high deserts filled with Joshua trees and red towering sandstone.
.
Airing down in Nevada
The Arizona Strip: A Vast Wilderness
The Arizona Strip, north of the Colorado River, offered 350 miles of untouched nature and no amenities. This remote area is a mix of Indian reservations and protected lands.The Strip is typical of the West with its red rock canyons and dry climate which leads to the vegetation of cacti grassland and sagebrush, to Junipers and Pinyon forests, and Ponderosas of Pines, Spruce, Fir, and Aspen trees on the Plateau. Plus, magnificent cliffs, spectacular canyons, and valleys filled this remote area.
Selfie on the trail
We meandered our way through a small section Gold Butte National Monument to our second mountain climb over Whitney Pass. Once over Whitney Pass, the high desert plains spread for miles called the Grand Gulch Canyon.The views were spectacular. The area is emote and vast. No crowds! No lines! Endless blue skies, isolated cattle corrals, lone cowboys (I saw one near the end of the trip), and one of the best places in the world to view the dark night skies.
Selfie from the passenger seat
We camped that night at an old abandoned mine near a solitary vista, Grand Gulch Mine. Mining engineers once said the mine contained some of the richest copper ore ever produced in the Arizona territory. However, the copper ore didn't mean getting rich quick. Ore was hauled four hundred miles by horse and wagon to Salt Lake City, Utah for smelting. A costly endeavor. A slow expensive trip. In 1918 when WW1 ended the copper prices plummeted. The mine shut down for 20 years.
Old Mining Truck
Then during WW2 the demand for copper rose again and Grand Gulch Mine came back to life. No longer using horse and wagon to haul the copper instead trucks successfully hauled out the ore. Copper mining continued until a fire in 1955 that destroyed the main buildings. Eventually, in 1958, the miners abandoned the mine.
My tent during sunset
It was a great night up on the Grand Gulch Mine's unpaved airstrip with the Upper Grand Wash Cliffs in the background. The light pollution from Las Vegas was still visible on the horizon, but the stars were abundant.
The lights from Vegas
Overlanding Tip: Night Sky Photography
Bring a tripod for long-exposure shots
Use a red light to preserve night vision
Day 2: Grand Canyon Views at Snap Point
Bob, Mary, and the crew were preparing a gourmet meal while the guests got to know each other on the first night of this amazing adventure. A Korean meal of Beef Bulgogi with a gigantic chocolate chip cookie and ice cream for dessert. The next morning was more great food, as a gourmet breakfast was served.
Breakfast was absolutely delicious, a five-layer egg bake cooked in a dutch oven. Once our bellies were full it was time to hit the trail.
Overlanding Tip: Camp Cooking
Invest in a quality Dutch oven for versatile cooking
Pre-plan meals and pack ingredients efficiently
Northern Arizona Strip
Our morning started out on dusty desert paths surrounded by Arizona's majestic mesas. We were headed to Snap Point for our first look at the Grand Canyon. It's the official western end of the Grand Canyon North Rim.
Grand Canyon
The road to Snap Point is deeply rutted and during certain parts of the year can be closed. The deeper you drive into the trail the tighter the squeeze as the bushes are taking over the dirt road. Definitely expect scrapes and scratches on your vehicle.
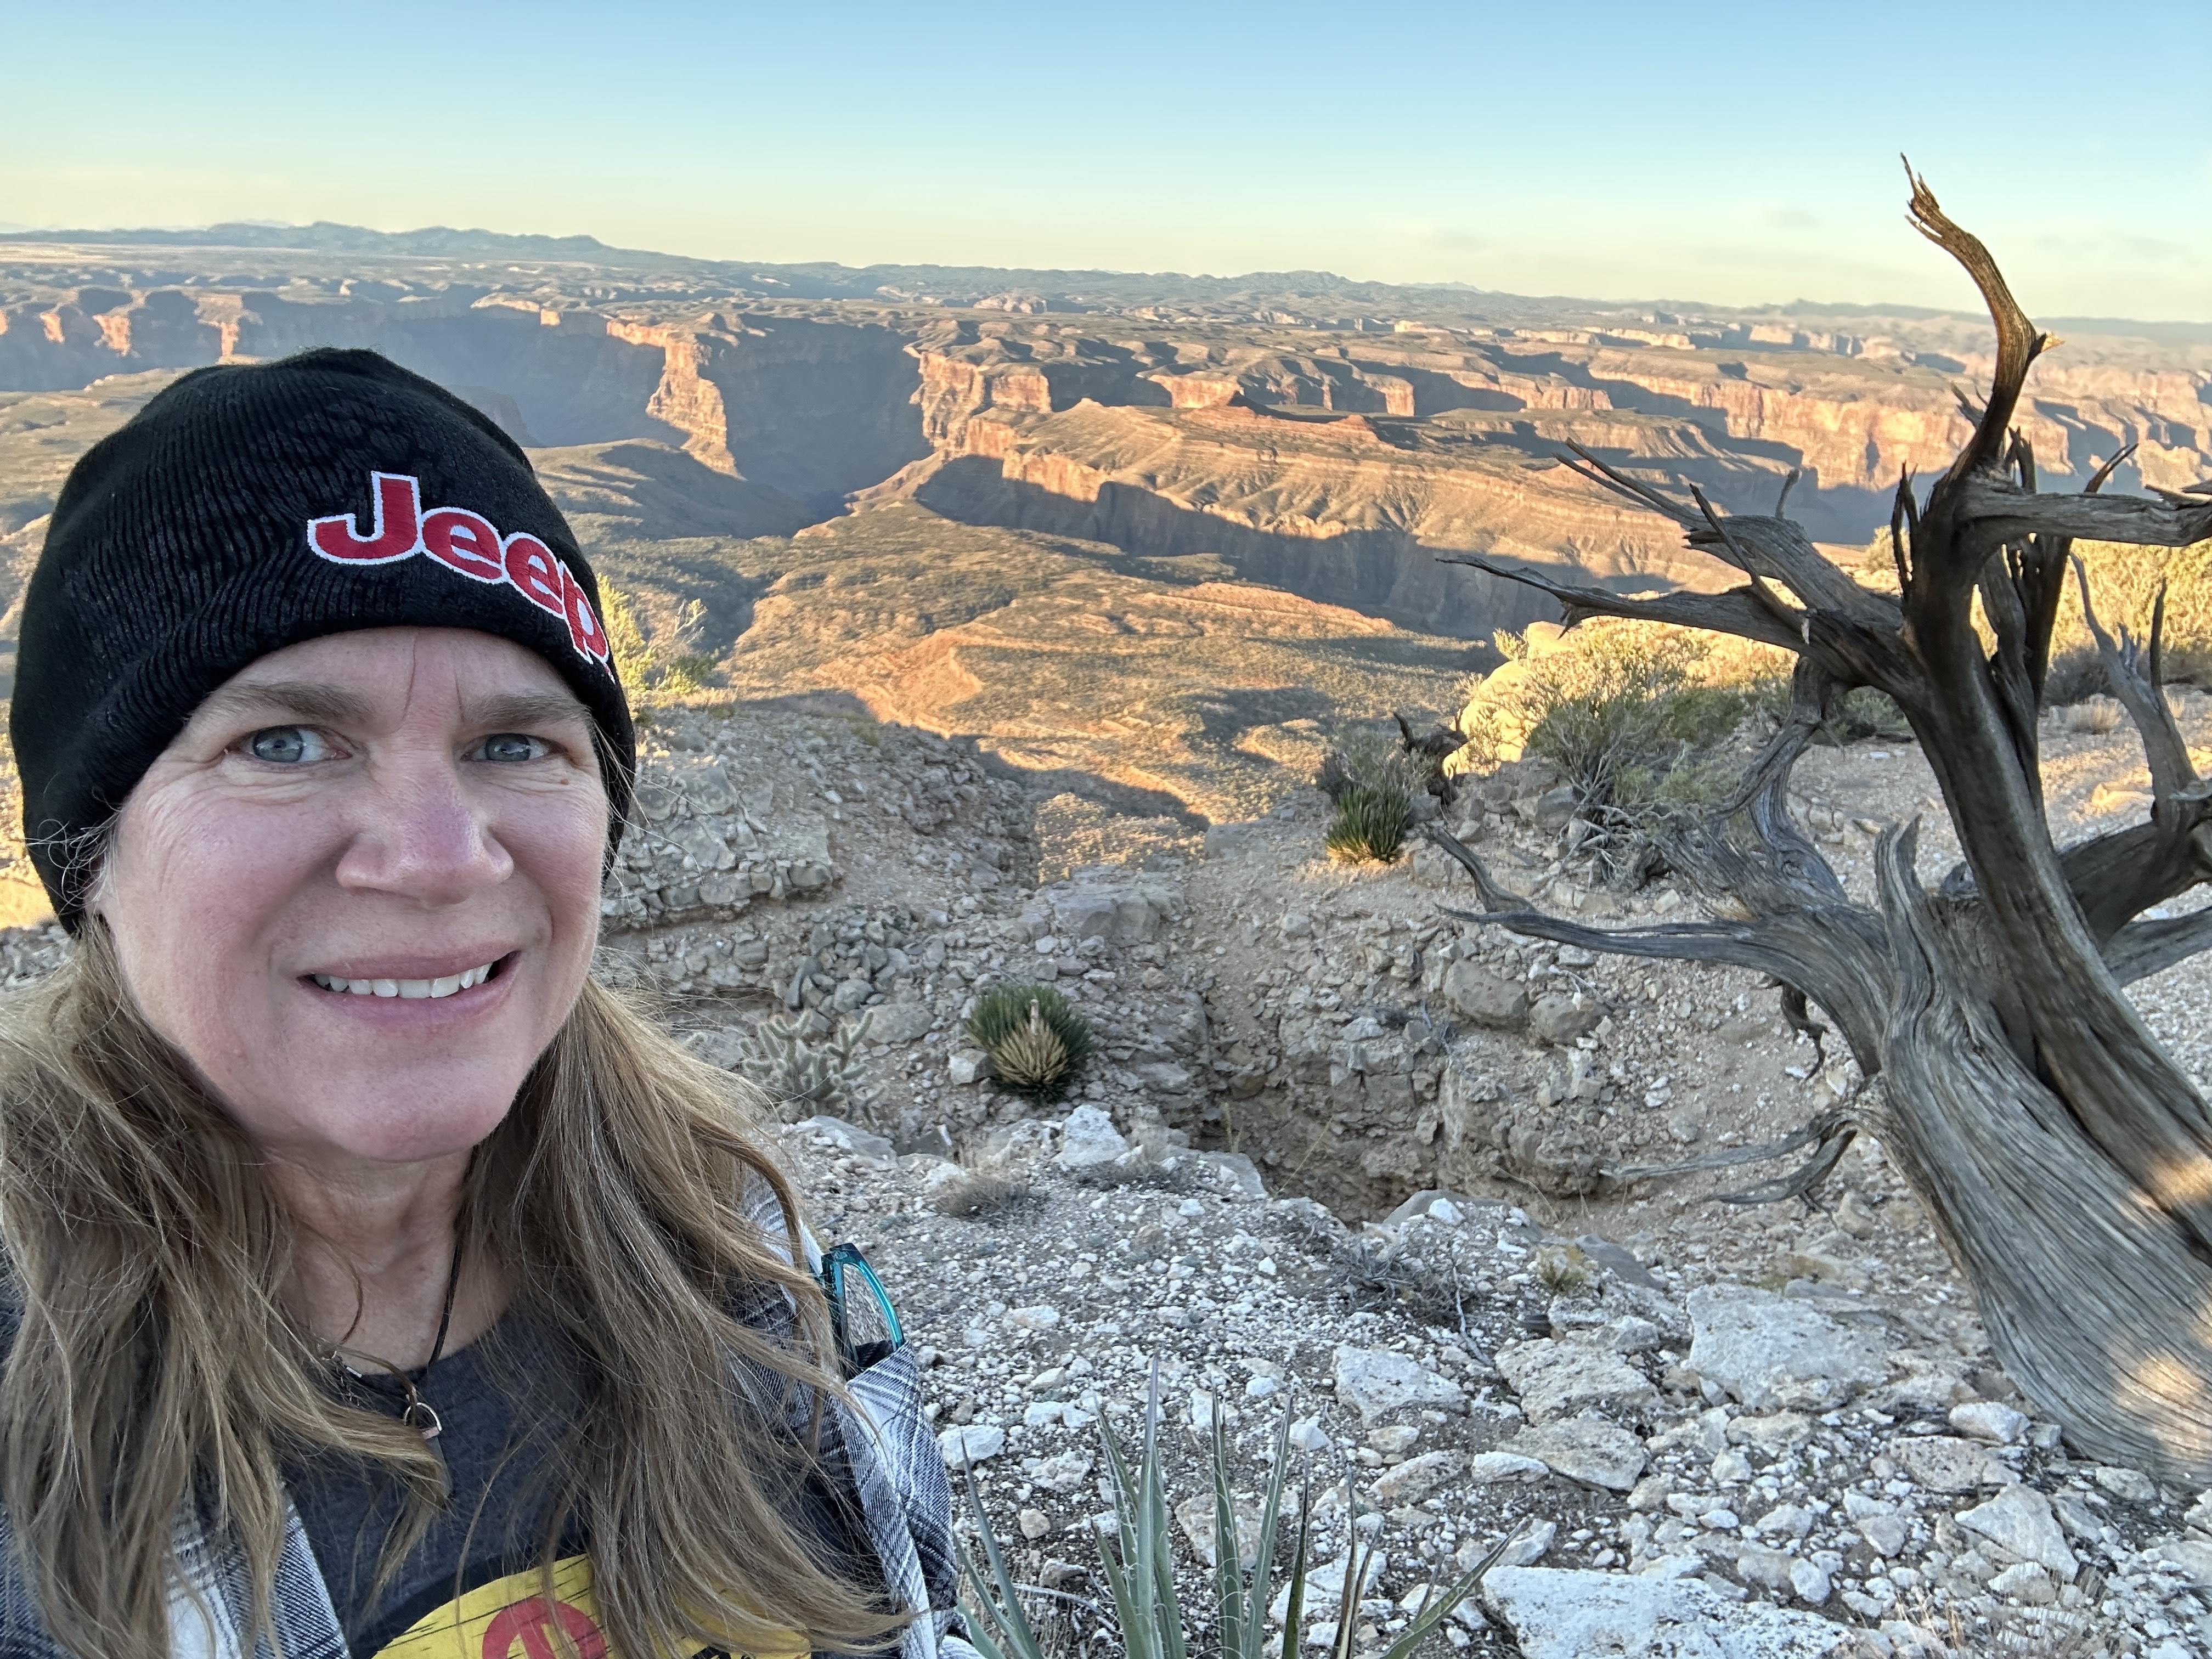
Me on the edge of the Grand Canyon
The squeeze was getting a little tight, so we found a small clearing at the edge of the high cliffs. We decided to get out here for our view here. It was simply breath taking.
After our amazing first view of the Canyon, we went back through what I named pinstripe alley. Then it was on to Twin Point for our second night of camping under the stars.
Selfie on the Grand Canyon
We arrived to camp early in the afternoon which gave the guests of 4Xploring a chance to chill on the scenic vista. The majestic cliffs sparkled with color as the sun began to set.
Bob and his crews were busy preparing another fantastic meal for dinner. This time a Dutch oven Italian dish.
Overlanding Tip: Protecting Your Vehicle
Be prepared for tight squeezes and potential scratches
Consider installing brush guards or rock sliders
Day 3: The Rough Road to Kelly Point
Day 3 started with a hearty breakfast of sausage and egg pinwheels. Another Yummy breakfast from Bob and the crew that did not disappoint.
My ten at Twin Point Overlook
We spent the night at Twin Point Overlook with the most spectacular views. Our next destination was a journey to Kelly Point tested our off-road skills with 4-5 hours on one of the roughest and slowest roads in the National Parachant Monument.
Grand Canyon
Old Ranch building
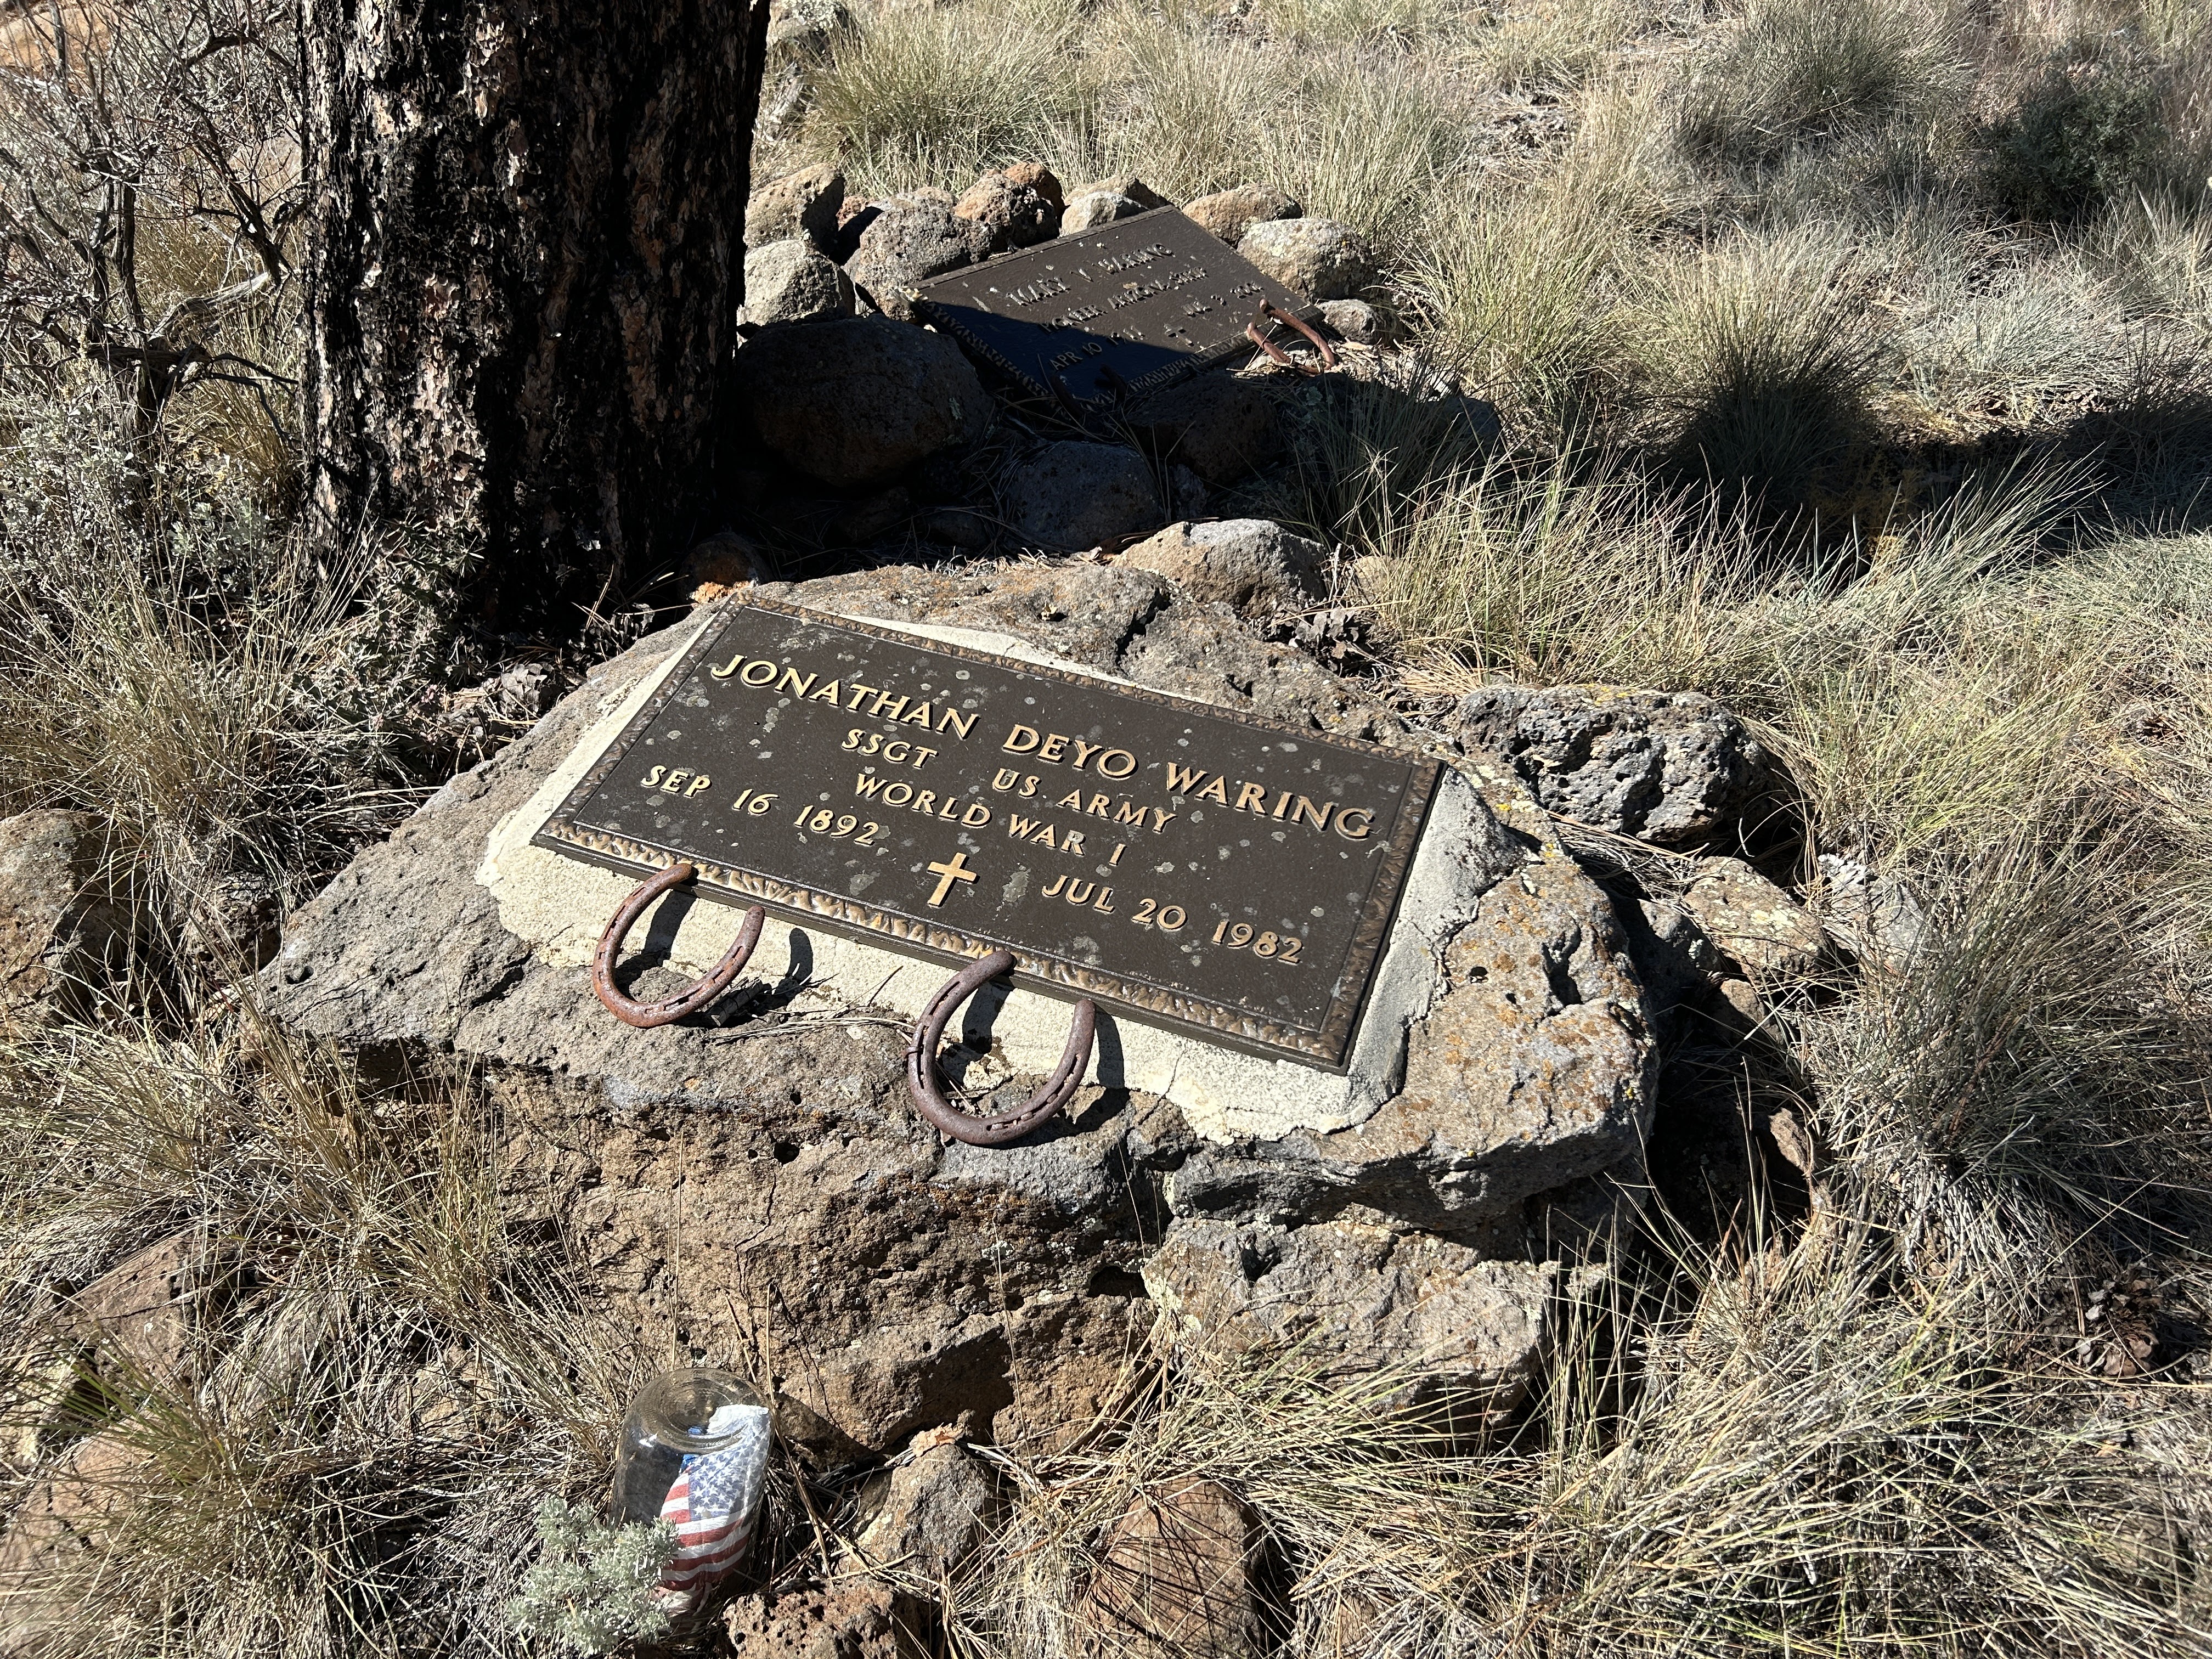
But first a pit stop at the Waring Ranch. A remote homestead and ranch established by Jonathan Deyo Waring in 1925. The site has cabins, corrals, fence lines, water tanks, and two holding ponds. Cattle ranching back in the day was the main economic activity for the settlers in this remote arid land.
Fence post
Jonathan Waring grew up in New York State, however, he admired Teddy Roosevelt and the ment of the Rough Riders. Waring was intrigued by the cowboys, miners, hunters and gamblers so he headed West to Phoenix. Later his adventures lead him to the Arizona Strip via Grand Gulch Mine. Something about the strip called to him and he began acquiring government land.
Ranch Fence Posts
Preston Nutter, an Arizona Strip cattle baron, was a rival of Waring's. Both ran cattle at the same time and both believed they owned a certain parcel of land at the rim of the Grand Canyon. When Nutter built a fence around the contested parcel, Waring retaliated by burning it down.
Gravesite of Johnathan Waring
Later ironically Waring was drafted into the U.S. Army to serve during World War I. He ended up in the in the Argonne Forest trenches of France, fighting in the largest offensive in United States Military history. He later returned to the Arizona Strip to acquire more land and cattle eventually selling his land to the National Park Service. The Waring Ranch is now a historic National monument.
Mary making beer bread
Back into our Jeeps, it was time for the bouncy four hours to our next stop. Then Bob and his crew whipped up some Hungarian Goulash while Mary baked us some tasty beer bread. Then ended the meal with hot fudge brownie and ice cream.
.
Overlanding Tip: Comfort on the Trail
Invest in quality shock absorbers for a smoother ride
Bring comfortable seating for camp
Day 4-5: Colorado River Views and Ancient Art
After our tasty breakfast of blueberry pancakes and sausage plus the spectacular sunrise at Kelly Point it was back to wheeling.
Blueberry pancakes and syrup
Jeeps on the trail
We headed back out the 27 miles from the point to the Waring Ranch, then on to our next location point overlooking the Colorado River with views that will take your breath away.
Selfie on the edge of the Grand Canyon
It was an amazing adventure with beautiful views, delicious Dutch oven meals, and meeting new friends. We were on an overland adventure along the northwestern rim Grand Canyon. Our overnight camping stops were overlooks located in Parashant National Monument including some of the most remote locations in the continental United States.
Selfie on the edge of the Grand Canyon
Our last day on the Arizona Strip was fabulous. Bob ad the crew filled our bellies with the best breakfast yet, Waffle Egg Bake. It was like a Quiche from a Dutch Oven.
Selfie with the Colorado River below
A few last views of the Colorado River and we were back on the trail. There were a couple more surprises waiting for us before we made it back to civilization.
Petroglyph's
Our first stop was the Nampaweap Petroglyphs. Nampaweap is site of several petroglyph's. Petroglyph's are rock carvings made by using a stone chisel or rock hammer.
Cave with pictographs
Our next stop was a random cave on the strip full of rare color pictographs. Then the long trek back to civilization.
campfire
.Overlanding Tip: Respecting Nature and History
Practice Leave No Trace principles
Observe petroglyphs and pictographs from a distance
An Unforgettable Overlanding Experience
This Grand Canyon adventure was more than just an off-road trip. It was a journey of self-discovery, filled with breathtaking landscapes, delicious meals, and new friendships. The Arizona Strip's remote beauty and challenging terrain make it a must-visit destination for any serious overlander
Don't forget to head over to my YouTube channel Jeep Life with Jeep Momma and check out my series of 5 videos.




.jpg)